Logging In
Use the link sent to you to log in. If you ever forget your username or password, you can click the link to reset it with your email address.
“The Dashboard”
Once you have logged in, you will be at your WordPress “Dashboard”.
There are a number of menu items, but the only ones you will use are PAGES, PRODUCTS, MEDIA.
Images Sizes
- Big home page image is 1380 pixels wide, height varying
- Product and gallery images are 960 px wide, height varying
Changing Home Page Content
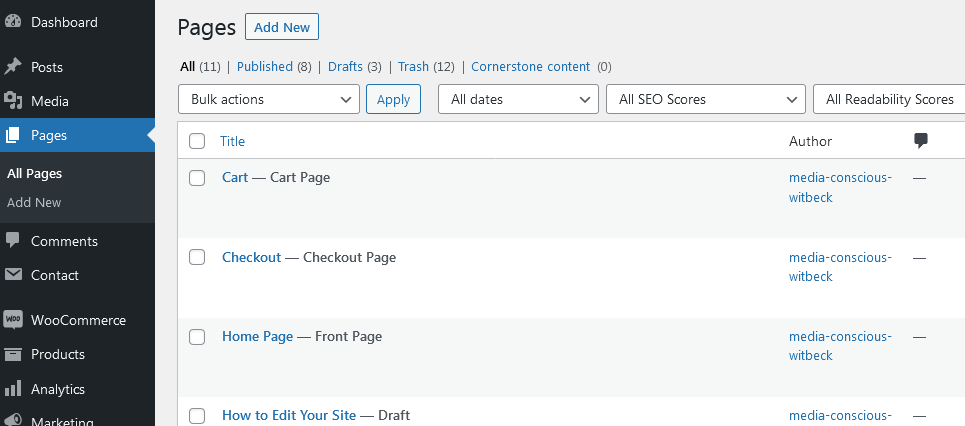
Go to PAGES in the left-hand menu.
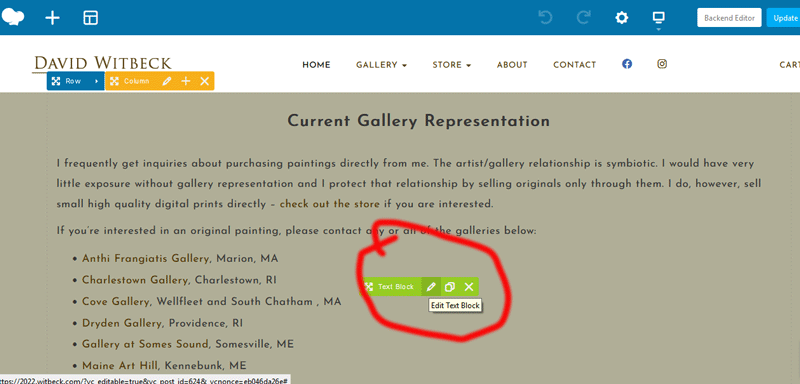
Hover your mouse over “Home” and click “Edit With WP Bakery Builder”. The page will open up with available editing tools.
Each section is its own “block” – either an image, header text or paragraph text. Hover over the section you want to change, and click the pencil icon. A dialogue box will open, and you can change text or update images as necessary.

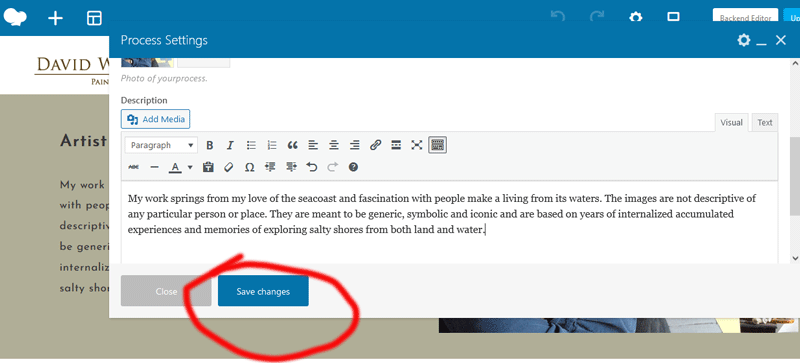
After making your edits, be sure to save your changes.
When you are finished making all of your edits on the page, you will now need to update it to make it live. Click “Update” in the top-right corner of the page:

Add / Edit Product Category & Description
You may occasionallly want to add a category, or change the description that appears on the store category page (e.g. fine art prints).
In the left-hand menu, roll over “Products”, then choose “Categories” from its submenu.

You can then either add a category, or put your cursor over the category name and click Edit. Be sure to save all changes.
Add / Edit / Remove Product
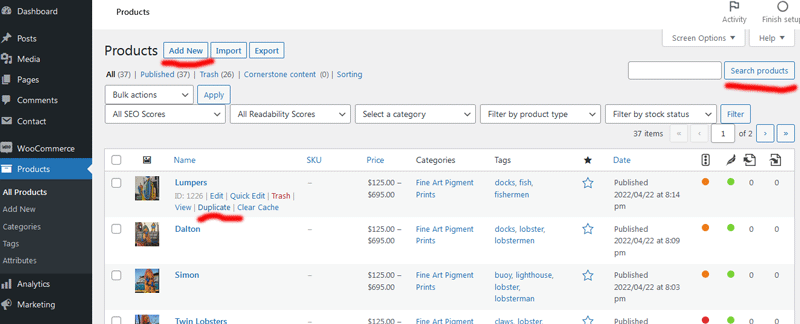
All products can be easily edited. Click on “Products” in the left-hand menu.
To ADD a product:
- For the quickest method, find a similar product (e.g. same available sizes), roll over its name, and click “Duplicate”. You can easily search for a product using the search box at the top-right.
- Otherwise, click Add New.
Once you are into the detailed product page, there are a number of fields. The following numbering system & accompanying images show you which items to fill in and what they are. Everything is recommended or required unless marked *Optional. See images below for screen shots.
- This is the main title of the product
- This is the long description of the product, which shows up at the bottom of the page (*Optional)
- Product category
- Product tags. These are like keywords, and show up on the product page as links. For instance, if “fisherman” is a tag, a user can click on that and see every product with “fisherman” as a keyword.
- The main product image.
- Additional product images (*Optional); see the Book for an example.
- SEO – focus keyword. Choose a short phrase this image might come up under in a search.
- SEO – short description. This is what shows up under the title of the page in Google Search results.
- Product Type – Either SIMPLE (one product, no size or price variations, e.g. relief prints) or VARIABLE (relief prints and book).
- If a simple product, just enter price, size and description.
If a variation, you will need to ADD variations, then you can optionally apply a different image, price, etc. to each variation (we use Paper Print, Small Canvas and Large canvas as our variations.) - Dimensions of product. Shows up under “Additional Information”
- Variation description (make sure to list and change size for each option). This shows up just before the “Add to Cart” button.
- Short Description – if not a variation, this is what shows up before the add to cart button.
When done, make sure to save all changes and make it live by clicking PUBLISH (new products) or UPDATE (existing products) at the top-right of the page.
To EDIT a product
Roll over the product’s title and click “Edit” from the menu that pops up (see above image). Then follow the same instructions as for “Add New”, replacing the items you would like to update.
Make sure to click “Update” at the top-right.


To REMOVE a product:
There are 2 ways to remove a product.
- To permanently remove a product, click “Trash” in the menu that comes up when you roll over the name
- To temporarily remove a product, you can “Quick Edit” it and set the “Status” field to “Draft”. Make sure to click Update at the bottom right when done.
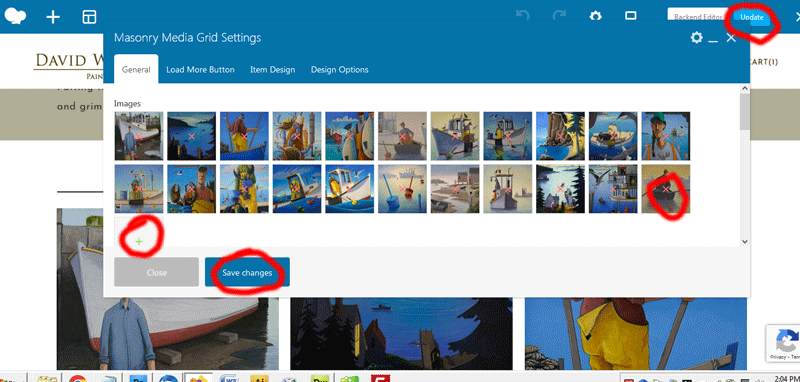
Update Galleries
Galleries are embedded on their own Pages, so just as with the home page, you will go to Pages in the main menu, then hover over the page you would like to edit and click “Edit with WP Bakery Builder”.
Then hover over the gallery images, and click the green pencil icon to edit.
Once the dialog box opens, you can:
- click the red “X” in any image to remove an image
- Click and drag an image to rearrange
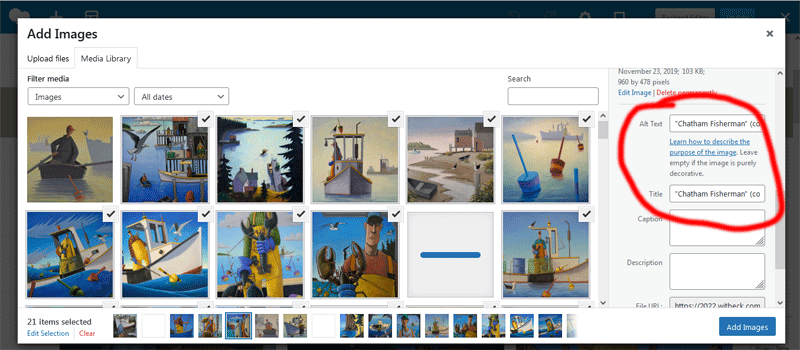
- Click the empty square with the green “+” icon to add an image.
When adding images, it is important to add their Title, size and medium information at the same time under both “ALT Text” and “Title” (see image below). This is 1) shown to the user and 2) makes the image easier to find for the future.
When done, make sure to click “Add Images” then “Save Changes” in the dialog box, then “Update” on the page itself.